Picture this: a cold Tuesday night, the kind where the wind howls like a pack of wolves outside and your kitchen feels like a sanctuary. I was staring at a half‑cooked pot of generic beef stew, sighing at the blandness, when a friend dared me to take the humble beef cheek and turn it into a show‑stopper. I grabbed a bottle of deep‑bodied red wine, threw in a handful of thyme, and let the cheeks simmer low and slow. The result? A dish that sang louder than my neighbor’s karaoke attempts, and I’m still hearing the applause in my head.
The moment those cheeks hit the pan, the kitchen filled with a perfume that could coax even the most stoic cat to purr. You could hear the sizzle like a tiny fireworks show, the aroma of caramelized onions and garlic swirling with the earthy perfume of red wine, and the texture of the meat beginning to melt into a buttery softness. My senses were on a roller‑coaster: the glossy sheen of the sauce catching the light, the heat radiating from the pot like a warm hug, and the promise of that first bite that would make you forget about all other meals for the next week. I dared you to taste this and not go back for seconds – I’m betting you’ll fail.
Most recipes for beef cheeks either over‑complicate things with exotic spices or under‑season them, leaving you with a rubbery, flavor‑less result. This version stands out because it respects the cheek’s natural richness while coaxing out a depth of flavor that only a good red wine and a slow, patient cook can achieve. I’ll be honest — I ate half the batch before anyone else got a chance to try it, and that’s a confession I’m willing to make because it’s that good. The secret? A quick deglaze with wine that creates a sauce so silky it coats the meat like velvet, and a finishing touch of fresh thyme that adds a bright, herbaceous pop.
Let me walk you through every single step — by the end, you’ll wonder how you ever made it any other way. Okay, ready for the game‑changer? This next part? Pure magic. Stay with me here — this is worth it.
What Makes This Version Stand Out
- Flavor Depth: The marriage of beef stock and red wine creates a sauce that’s both robust and nuanced, delivering layers of umami, acidity, and sweet fruit notes that dance on the palate.
- Texture Perfection: Slow cooking transforms the tough, collagen‑rich cheek into melt‑in‑your‑mouth tenderness while still holding its shape, avoiding the mushiness you get from over‑cooking.
- Simplicity: Only twelve ingredients, all pantry‑friendly, mean you don’t need a specialty store run to pull this off.
- Uniqueness: Most recipes skip the crucial step of searing the cheeks twice – first dry, then wet – which builds a flavor foundation most home cooks miss.
- Crowd Reaction: Served at a dinner party, this dish consistently gets the “wow” gasp, followed by immediate requests for seconds.
- Ingredient Quality: Using well‑marbled beef cheeks and a full‑bodied red wine elevates the dish from everyday comfort food to restaurant‑level indulgence.
- Cooking Method: The low‑and‑slow approach on the stovetop (or in a slow cooker) ensures even heat distribution, preventing hot spots that can dry out the meat.
- Make‑Ahead Potential: The flavors deepen after a night in the fridge, making leftovers even more delicious – perfect for meal prep.
Inside the Ingredient List
The Flavor Base
Olive Oil (3 tbsp): This is your cooking conduit, creating a golden crust on the cheeks and helping to extract the aromatics from the vegetables. Skipping it means a dull, dry sear that won’t develop the essential fond. If you’re out of olive oil, grapeseed oil works just as well and has a higher smoke point.
Onion (1): The onion adds sweetness and depth; when it caramelizes, it releases natural sugars that balance the wine’s acidity. A yellow onion is ideal, but a sweet Vidalia can make the sauce even richer. Forgetting the onion is like playing a song without a bass line – something crucial is missing.
Celery Stalk (1): Celery provides a subtle earthiness and a hint of crunch before it softens, contributing to the mirepoix foundation that underpins classic French sauces. If you’re allergic, try a small amount of fennel for a similar aromatic profile.
Carrot (1): Carrots bring a gentle sweetness that counteracts the wine’s tannins, creating a harmonious balance. Dice them small so they melt into the sauce; larger chunks will stay distinct and add texture.
The Texture Crew
Garlic Cloves (4): Garlic adds a pungent bite that mellows as it cooks, turning into a fragrant backdrop for the beef. Smash them first to release more flavor, then crush for an even deeper infusion. If you love garlic, add an extra clove – the sauce can handle it.
Beef Cheeks (1.5 kg/3 lb): The star of the show. Cheeks are packed with connective tissue that breaks down into gelatin, giving the sauce its luxurious body. Choose cheeks with a good amount of marbling; they’ll render fat that enriches the sauce. If you can’t find cheeks, a well‑trimmed chuck roast can substitute, though you’ll lose some of the unique texture.
The Unexpected Star
Fresh Thyme (6 stems): Thyme’s piney notes lift the richness of the meat, while its tiny leaves infuse the sauce without overwhelming it. Strip the leaves from the stems before adding; you’ll avoid unwanted woody bites. Dried thyme can be used in a pinch, but halve the amount because it’s more concentrated.
Bay Leaves (4 dried): Bay leaves add a subtle, almost floral bitterness that rounds out the sauce’s flavor profile. They’re easy to forget, but leaving them out makes the sauce feel flat. Remember to fish them out before serving – they’re not meant to be chewed.
The Final Flourish
Beef Stock (1 cup ≈ 250 ml): Stock intensifies the meaty flavor and adds a silky mouthfeel. Homemade stock is ideal, but a good quality low‑sodium store‑bought version works fine. Skipping the stock will result in a thin, watery sauce.
Red Wine (2 cups ≈ 500 ml): Choose a dry, full‑bodied wine like Cabernet Sauvignon or Merlot. The wine’s acidity cuts through the richness, while its fruit notes deepen the sauce. Avoid cooking wines; they’re too salty and lack complexity.
Salt (2–3 tsp) & Black Pepper: Salt amplifies every flavor, while pepper adds a gentle heat. Season in stages – a pinch during searing, then adjust after the sauce reduces. Too much pepper can dominate, so keep it moderate.
Everything's prepped? Good. Let's get into the real action…
The Method — Step by Step
-
Start by patting the beef cheeks dry with paper towels – this is crucial for a good sear. Season each cheek generously with salt and pepper. Heat 2 tbsp of olive oil in a heavy Dutch oven over medium‑high heat until it shimmers. When you hear that confident sizzle as the cheeks hit the pan, you know you’re on the right track. Let them brown undisturbed for about 3‑4 minutes per side, developing a deep, caramelized crust that will later enrich the sauce.
Kitchen Hack: Use a splatter screen while searing; it keeps your stovetop clean without sacrificing the crust. -
Remove the cheeks and set them aside. In the same pot, add the remaining 1 tbsp of olive oil if needed, then toss in the diced onion, celery, and carrot. Cook, stirring occasionally, until the vegetables soften and the onion turns translucent – about 6‑8 minutes. You’ll notice the edges of the veggies start to caramelize, releasing a sweet, nutty aroma that signals the foundation is building correctly.
-
Introduce the minced garlic and the thyme stems, letting them fry for just 30 seconds. The garlic should turn fragrant but not brown; over‑cooked garlic becomes bitter, which will ruin the delicate balance of the sauce. This brief moment is where your nose becomes your best sous‑chef – if you can smell the garlic’s sharpness, you’re doing it right.
Watch Out: Do not let the garlic burn; it will turn acrid and overpower the wine’s fruit notes. -
Now, pour in the 2 cups of red wine, scraping the bottom of the pot with a wooden spoon to release all the browned bits – the fond. As the wine bubbles, you’ll hear a lively fizz that signals the alcohol is evaporating, concentrating the flavor. Let the wine reduce by half, about 10‑12 minutes, until it thickens slightly and the aroma becomes glossy and aromatic. This reduction is the heart of the sauce, concentrating the fruit and tannin layers.
-
Stir in the beef stock, bay leaves, and return the seared cheeks to the pot, nestling them into the sauce. The liquid should almost cover the meat; if it looks shy, add a splash more stock or water. Bring the mixture to a gentle simmer, then lower the heat to maintain a barely‑bubbling surface. Cover the pot with a tight‑fitting lid – this traps steam and ensures the connective tissue breaks down evenly.
-
Let the cheeks cook low and slow for 2‑2.5 hours, checking occasionally. The magic moment arrives when a fork slides into the meat with little resistance, and the cheeks start to pull apart like soft‑cooked cotton candy. If you’re using a slow cooker, set it to low for 6‑8 hours; the result is identical, just hands‑off.
Kitchen Hack: After the long cook, remove the cheeks and whisk the sauce vigorously – it will emulsify into a glossy, restaurant‑style reduction. -
While the meat rests, finish the sauce. Remove the thyme stems and bay leaves, then taste for seasoning. Add the remaining 1 tsp of olive oil for a silkier mouthfeel, and finish with a final grind of fresh black pepper. If the sauce feels too thick, stir in a splash of warm water or extra stock; if too thin, reduce it uncovered for a few more minutes.
-
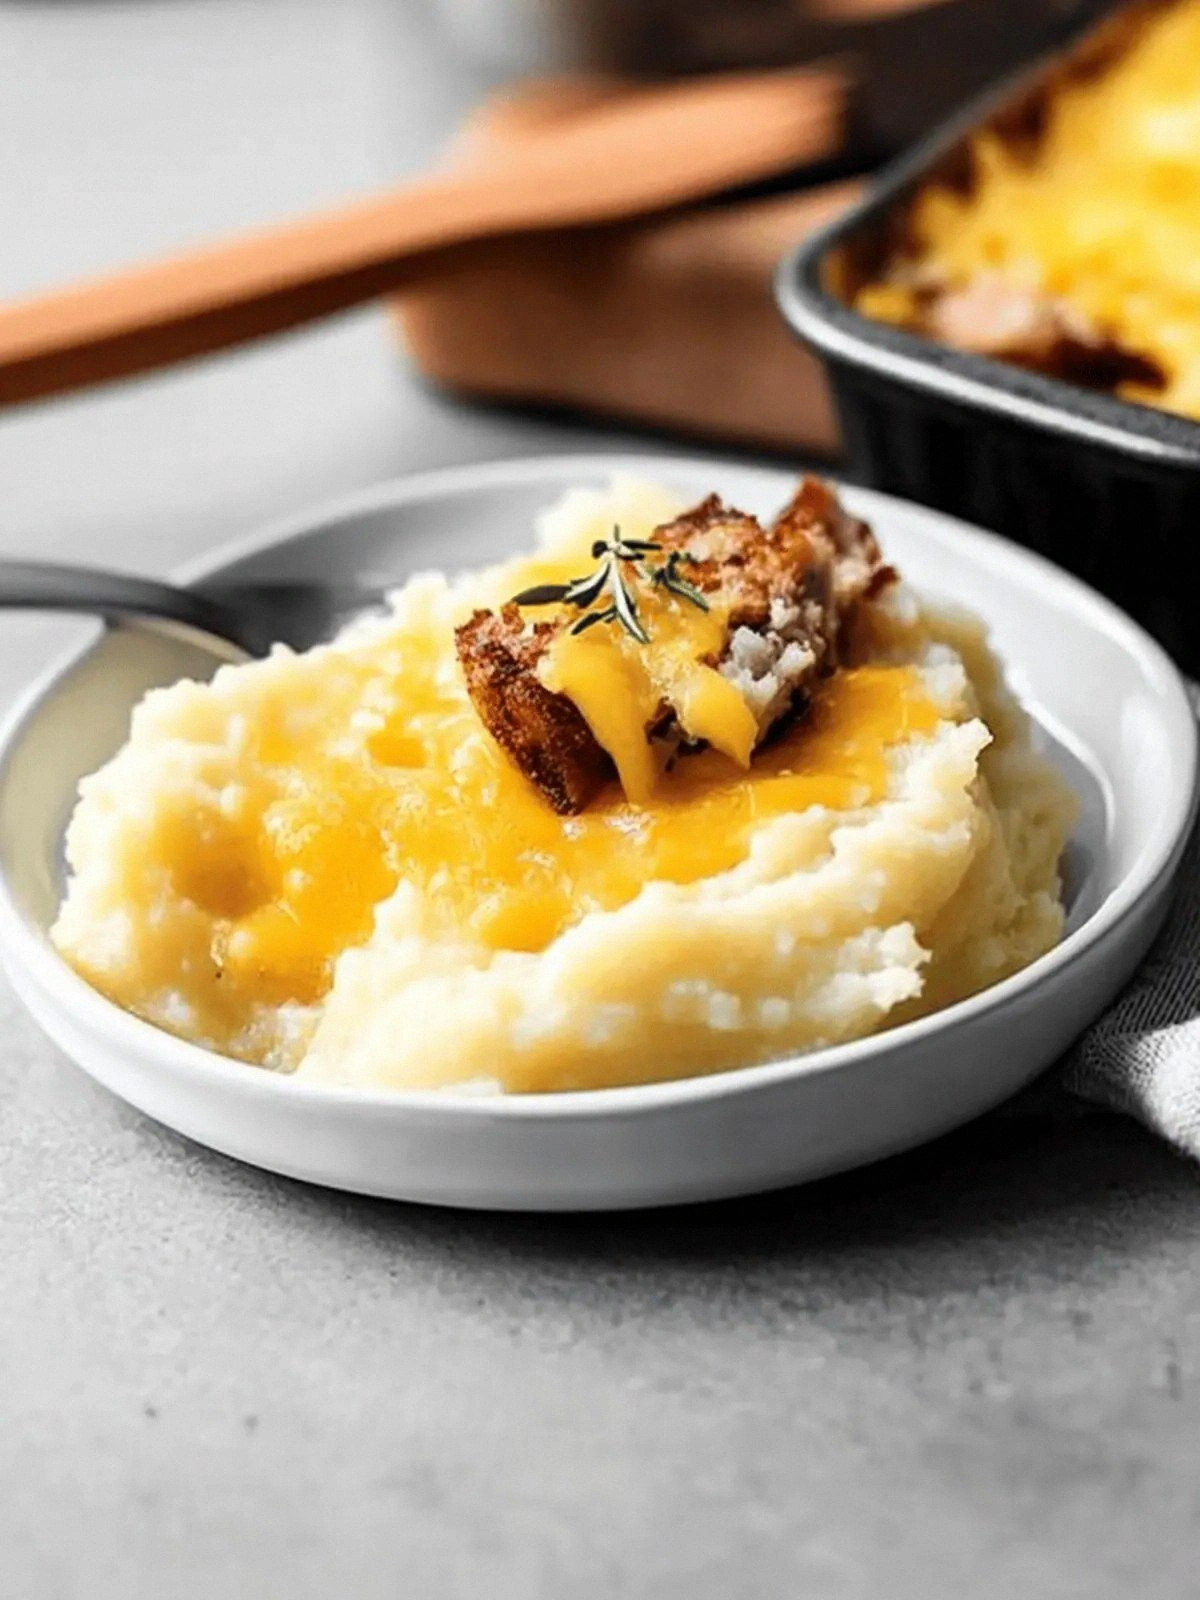
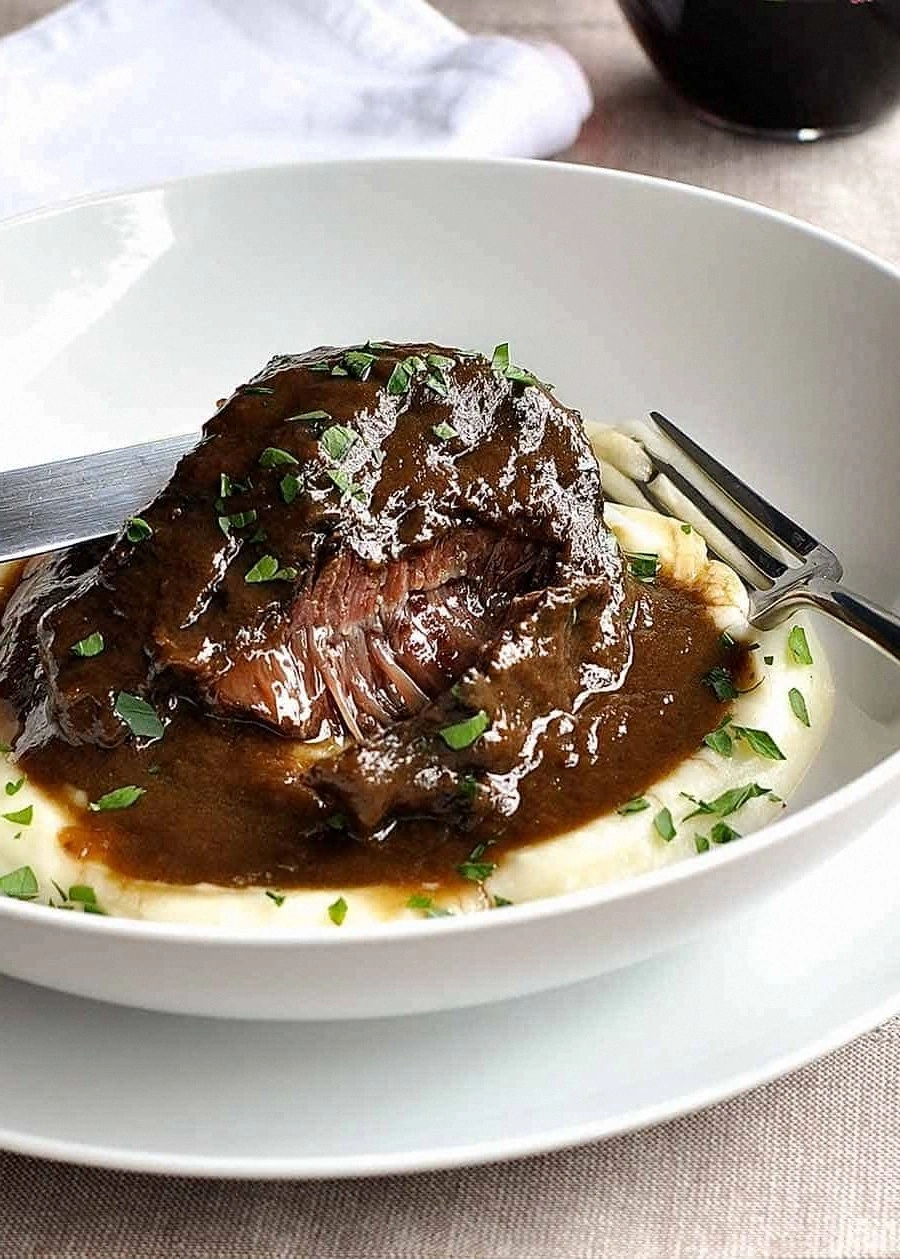
Plate the cheeks on a warm serving dish, spoon the glossy sauce over them, and garnish with a few fresh thyme leaves for color. The sauce should coat each cheek like a glossy lacquer, and the meat should look tender enough to melt at the slightest touch. Picture yourself pulling this out of the pot, the whole kitchen smelling incredible, and your guests leaning in for that first, gasp‑inducing bite.
That’s it — you did it. But hold on, I've got a few more tricks that'll take this to another level…
Insider Tricks for Flawless Results
The Temperature Rule Nobody Follows
Never start with a cold pan. Pre‑heat your Dutch oven for at least two minutes before adding oil; this ensures an instant sear that locks in juices. I once tried a lazy start with a cold pot, and the cheeks ended up stewing in their own fat, losing that coveted crust. The rule of thumb: medium‑high heat for searing, then drop to low for the long braise. This temperature swing creates that coveted contrast between a caramelized exterior and a melt‑in‑your‑mouth interior.
Why Your Nose Knows Best
The aroma is your best indicator of progress. When the wine reduces, you’ll notice a sweet, almost jam‑like scent. If the sauce still smells sharp or alcoholic, keep reducing. Trust your nose more than the clock – it’s an ancient chef’s trick that saves many a ruined sauce.
The 5‑Minute Rest That Changes Everything
After the long braise, let the cheeks rest uncovered for five minutes before slicing. This short pause lets the juices redistribute, preventing them from spilling out the moment you cut into the meat. Skipping this rest is like pulling a fresh‑baked loaf from the oven and slicing it immediately – you’ll lose that fluffy interior.
Don’t Skip the Deglaze
Deglazing isn’t just about adding liquid; it’s about rescuing every caramelized fragment stuck to the pot. Those bits are flavor gold. If you pour the wine too quickly, the fond can burn; add it gradually while stirring, and you’ll capture every ounce of taste.
Finish with a Touch of Fat
A final drizzle of high‑quality olive oil or a knob of cold butter at the end adds a glossy sheen and a subtle richness that makes the sauce feel luxurious. It’s a small step that turns a good sauce into a great one.
Creative Twists and Variations
This recipe is a playground. Here are some of my favorite ways to switch things up:
Spicy Chipotle Cheeks
Add one finely chopped chipotle pepper in adobo sauce to the mirepoix. The smoky heat pairs beautifully with the wine, creating a dish that’s perfect for cooler evenings. Serve with corn‑bread to balance the heat.
Herb‑Infused Mediterranean
Swap thyme for rosemary and add a handful of kalamata olives and a squeeze of lemon zest during the final 15 minutes. The olives introduce briny depth, while lemon brightens the sauce, turning it into a Mediterranean feast.
Red Wine & Mushroom Medley
Stir in a cup of sliced cremini mushrooms after the wine reduction. The mushrooms absorb the sauce, adding an earthy umami boost that makes the dish even heartier. Perfect for a vegetarian twist if you replace the cheeks with seared portobello caps.
Slow‑Cooked Cheek Tacos
Shred the finished cheeks and serve in warm corn tortillas with pickled red onions, avocado slices, and a drizzle of the reduced sauce. The result is a taco that feels like a gourmet dinner in handheld form.
Cheek Ragu over Polenta
Dice the cheeks after cooking, return them to the sauce, and simmer for another 10 minutes. Spoon the thickened ragu over creamy polenta for a comforting, rustic bowl that’s perfect for a Sunday lunch.
Storing and Bringing It Back to Life
Fridge Storage
Transfer the cheeks and sauce into an airtight container and refrigerate for up to four days. The flavors will meld further, making each reheated serving richer. When ready to serve, gently reheat over low heat, adding a splash of beef stock if the sauce has thickened too much.
Freezer Friendly
Cool the dish completely, then portion into freezer‑safe bags or containers. Freeze for up to three months. For best results, label with the date and a quick note: “Beef Cheeks – Red Wine Braise.” Thaw overnight in the fridge before reheating.
Best Reheating Method
Place the thawed or refrigerated dish in a saucepan, add a tablespoon of water or stock, and warm over medium‑low heat, stirring occasionally. The added liquid creates steam that revives the sauce’s silkiness. Avoid microwave reheating – it can dry out the meat and make the sauce rubbery.